I'm going to deviate from my usual realm of expertise today and instead, I will be writing about how to make an upcycled bunny outfit for a newborn from an old sweater. If you were looking for a photography blog post, you can skip right to the bottom of the post to see the outcome. If you're looking for a fast and easy way to make a cute bunny outfit for a newborn, keep reading.
To make the outfit, you will need the following;
- An old sweater or cardigan
- A sewing machine or a great technique in hand sewing
- A good set of scissors
- Thread
- A tape measure
- Pins
- Paper glue
- Tracing paper
Let me preface this post by saying that I am not a sewer. I come from a long line of sewing gurus and unfortunately, I don't carry the gene. In fact, I can hear my mother screaming all the way from the other side of the world as she reads this. Needless to say, the woman has gotten me out of more sewing conundrums than anyone should ever have to put up with. Mostly because I don't like following patterns and then I hit a wall.
This experiment was based on 2 tutorials I found on
Pinterest and another tutorial I found online by
Jessica Rae. She refers to her style as Redneck sewing and I think this tutorial definitely fits the bill. This outfit is not designed for the rough and tumble lifestyle of a toddler. It's just a little outfit to put on a newborn for a quick Easter photo. I live by the theory that bad sewing and loose threads can always be photoshopped out.
Firstly, I forgot to take a photo of the cardigan I chose before I chopped it to pieces. Luckily, I had it in 2 colors, so I'll start with showing you the purple cardigan. The one I hacked up was grey, but you get the general idea.
 |
This is what then end result looks like. I made a pair of pants with 2 hats. I also made detachable ears and a detachable bunny tail so that the oufit can still be used year round, not just for Easter.
|
To start off with, I grabbed a pair of newborn pants to take measurements from. Some of you may not have a spare pair of baby trousers, so you can use the measurements I came up with. Again, this is not scientific and I'm not Coco Chanel. I just needed a guideline and the measurements were
- 12 inches length in the leg
- 7 inch inseam
- 5 inch rise
- 5.5 inches wide per leg
Next I took the cardigan and measured out 12 inches on each sleeve. This worked out perfectly and I was able to cut the sleeves right where they hit the body of the cardigan.
Which resulted in have 2 x 12 inch sleeves, ready to go.
The sleeves were slightly tapered and I wanted them a bit straighter, so I sewed a straighter line up the side that already had a seam, using a zig zag stitch.
Then I measured each arm (leg?) 5 inches down and marked it with a pin. Once they were marked, I cut down to the pin. Notice I cut the side that didn't have a seam.
I turned both sleeves right side out again and then placed pins around the rise. Using a zig zag stitch, I sewed the rise together. Make sure you turn everything right side out. I didn't the first time around and I ended up having to do some unpicking.
Once everything is done, you should have something that resembles a small pair of pants.
 |
| Inside out |
 |
| Right side out. |
I turned the pants inside out again and heated up the iron. I folded over about an inch (as you can see from the photo on the left, it's kind of hard take a measurement because I wasn't following a pattern and everything's crooked!) and pressed and then folded them over about an another inch again and pressed them again. Once everything was pressed, I placed pins in the waistband to guide me and I used a straight stitch to sew in the waistband. It's hard to see, but the sewing was about an inch from the top.

Now, here's where it starts to get really redneck and my mother is going to be hanging her head in horror. Again, it's just for photography. It's all smoke and mirrors around here. I wanted to put a little drawstring on the pants using Thick and Quick wool. I had some in a nice oatmeal color that I thought would look great with the pants, but I'll be the first to tell you that I was never any good at sewing button holes. However, after reading the aforementioned tutorials, I learned a new trick. I cut 2 holes for the drawstrings in the waistband and then put a little Elmer's glue around the holes to stop them from fraying.
While I was waiting for them to dry, I decided to start on the hat. I liked the flowers on the cardigan, so I decided to make a quick hat using them. This isn't the hat that would go with the bunny outfit, but I knew I was going to be able to get 2 hats out of the cardigan.
 |
| I measured out a hat that I already had, and it was about 8 inches wide and 5 inches tall. Then I measured out what was left of the cardigan. |
 |
| I cut out a chunk from the shoulder section and used my hat as a guide. |
 |
| I went back to a zig zag stitch and allowed for an extra inch in sewing. |
I cleaned up the edges on the hat and turned it right side out again and went back to making a drawstring for the pants.
Using a safety pin, I pulled the Thick and Quick wool through the pants and I kept the wool quite long. Once I had it even on both sides, I tied a bow at the length that I liked and tied the ends to keep them from fraying.
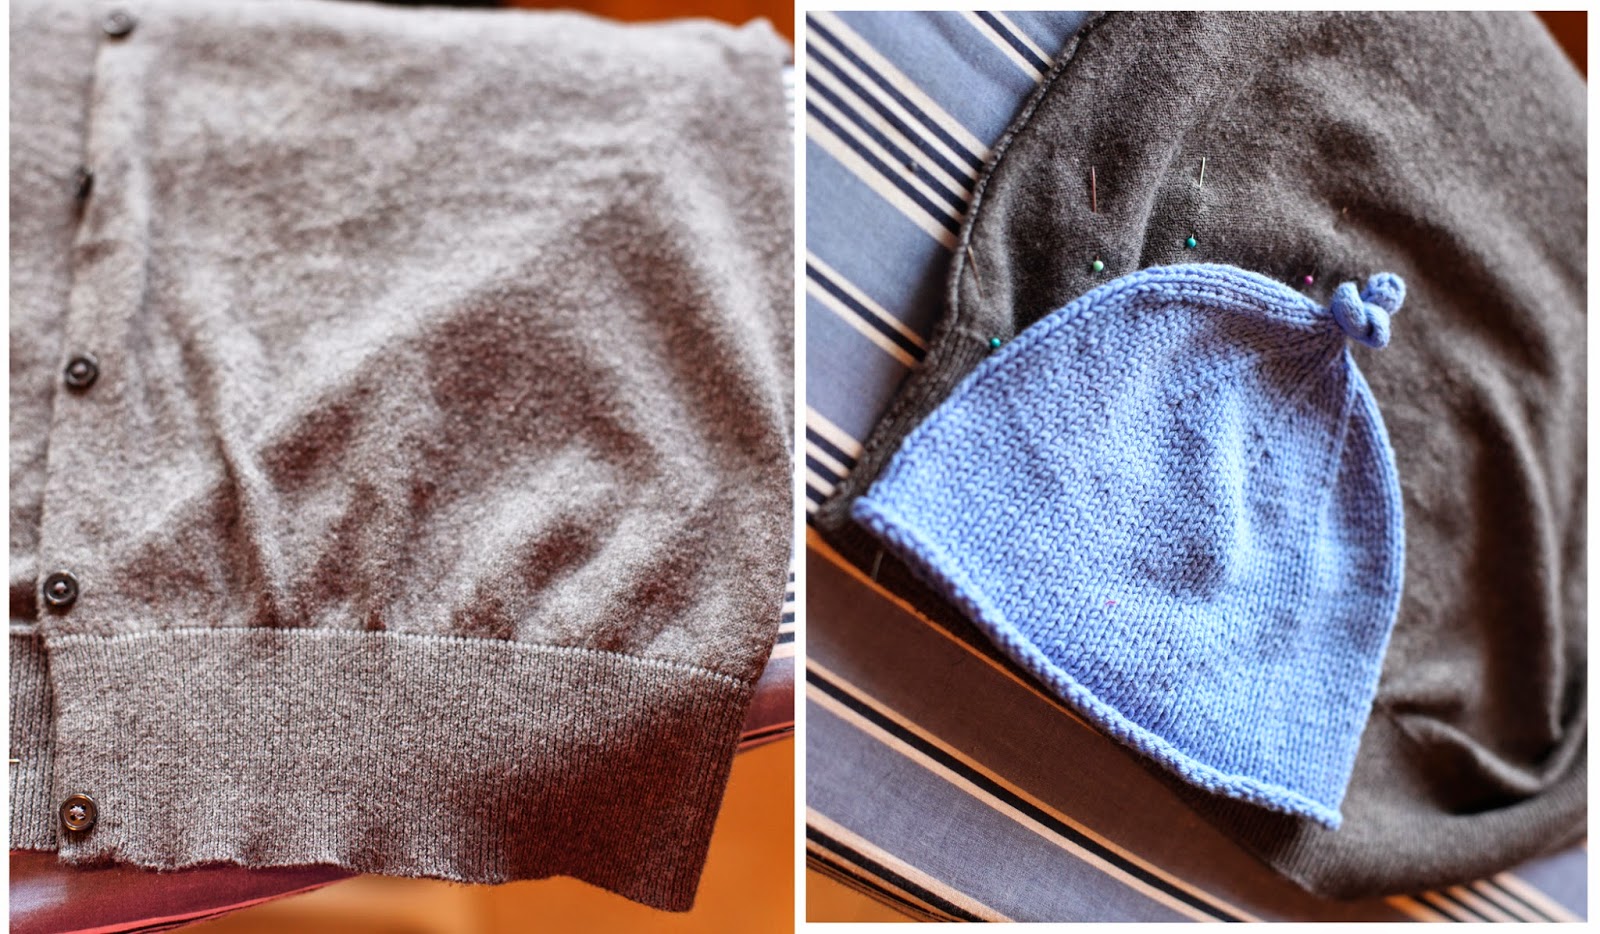
So at this point, I had this. I knew I wanted to make another hat with detachable bunny ears, so I pulled out the blue hat again.
Taking a piece from the bottom of the cardigan, I put the hat on the bottom of the cardigan and started pinning around it for a guide. This way I could also take advantage of the stretchy seam that was already in place at the bottom of the cardigan.
Using my pins as a guide again, I sewed and arch shape using a zig zag stitch again.
I cleaned up the edges with my scissors and gave it a test run on my son's teddy. So far, so good. I cut another piece out of the cardigan to start on the ears.
I drew some ears out on non stick baking paper. In all honesty, I didn't leave enough room for sewing. I would recommend having enough room to cut at least half and inch around the ears to allow for sewing. Once they were cut out, I used pins to hold them together and I used a zig zag stich again. I allowed about a 1 inch gap in the bottom to turn them right side out again.
Using a knitting needle, I was able to push the ends out and give the ears more shape. I ironed them flat and then thought I would use the wool to embroider little stitches around the ears.
That I idea was quickly squashed, once I realized I couldn't pull the needle through the ears because it was too thick. I tried to pull the wool apart, thinking it would result in wool at half the width and just as much strength. Unfortunately, it gave it more of a candy floss consistency, which gave me another idea.
I pulled the wool to pieces, and the more I kept pulling at the wool, the more it became like cotton wool. I added glue to the ears and voila, the wool would now become bunny ear fluff.
Using the same technique, I pulled some more wool apart and to make a bunny tail for the pants.
The ears and the bunny tail were all added to the outfit using safety pins. This way I can still use the hat and the pants year round.
Keep in mind when you're reading this that I was also taking care of a 9 month old baby and a dog during a huge blizzard this same day, hence the graham cracker crumbs everywhere!
The result of all of this crafty fun was this photo of little Paxton during his newborn shoot a few days later. Here he is in all his bunny glory!
Mum, if you're still reading this, thanks for getting me out of all of the sewing messes I've caused over the years. Apparently 2 years of Home Economics at Waikato Diocesan School for Girls wasn't enough. I may not know how to sew, but I can take a fairly decent photo! xxoo